Building a Shop Workhorse: DIY Router Table on a Shoestring Budget
You don't need to shell out a fortune for shop upgrades. This build shows how resourcefulness and basic joinery can get you a custom router table ready for action.

There’s a difference between a good plan and a finished piece of joinery. Building a router table is a perfect example of that difference. Too often, folks assume that shop tools—the things that make your workflow smooth, the things that save you hours of painstaking hand work—are prohibitively expensive. They assume you need a brand-new, factory-grade setup.
But if you've got a decent understanding of basic carpentry and a willingness to wrestle with some reclaimed lumber, you can build a workhorse that performs just as well, if not better, than the big box store units. This project is less about buying components and more about optimizing the process. It's about making the tool fit the job, and the job fit your budget.
The Art of the Resourceful Shop Build
This particular router table build is a masterclass in making things work with what you already have. The core principle is smart joinery and maximizing the utility of scrap material. We're talking about taking common furniture panels—the kind of stuff you might otherwise just throw out—and turning them into precision jigs.
The process, as demonstrated in the video, involves a few key steps that every woodworker should internalize: prep, adjust, and secure.
Key Techniques to Master
The creator walks through several techniques that are perfect for any shop student or seasoned woodworker looking to save cash and learn shop skills. Here’s a breakdown of what you’re really learning:
- The Reclaim Advantage: Instead of buying specialized hardwood for the main body, using solid furniture panels (plywood with real wood laminates) keeps costs rock-bottom while maintaining structural integrity.
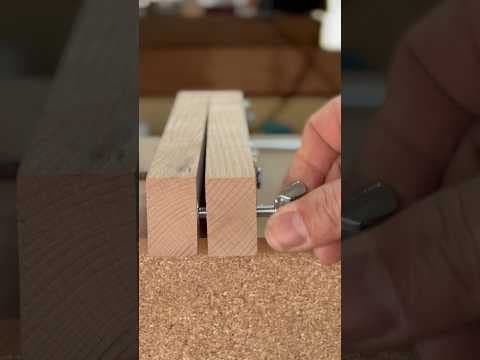
- The Importance of the Rebate: Notice the time spent filing out the brackets and creating rebates on the sides and back. These aren't just cosmetic cuts; they are what allow the jig to interface cleanly with your work surface and vice.
- Adjustability is Everything: The fence, built with notches and clamps, is the unsung hero of this build. By making the fence adjustable, the router table instantly adapts to different widths—a massive time saver when doing trim work or baseboard runs.
- The Fixturing System: The use of clamps and a table-mounted vice is crucial. A great piece of equipment is only as good as how well it's secured. The ability to clamp it flush to a ball bearing or a worktable means you get maximum stability, which is paramount when routing deep cuts.
Beyond the Router Table
What this build teaches us is that true carpentry isn't about the monetary value of the tools; it's about the knowledge you bring to the bench. Whether you're tackling complex cabinetry joinery, running a dado for a custom frame, or shaping a live edge slab, the core principles remain: measure twice, cut once, and always make sure your jigs are stable and repeatable.
If you're looking to learn these skills—from perfecting a dovetail joint to building out a specialized piece of shop equipment—there are resources right in your community. If you're a student, check out a local wood shop class. If you're ready to take the next step, consider finding a local Carpenter Angel or listing a custom commission to put these skills to the test.
Frequently Asked Questions
Loading comments...
Related Posts
Precision Jigwork: Building an Adjustable Fence for Perfect Trim Cuts


Running the Numbers: Evaluating the New Oliver 15-Inch Benchtop Planer

The Three Pillars of Milling: Why You Need More Than One Machine
